Introduction:
For creative and decorative models, 3D printing has created countless opportunities; the curving tree 3D print is among the most visually beautiful designs. Whether used as a centerpiece, a house décor piece, or a creative project for aficionados, curving tree designs, with their use of 3D printing technology’s precision, catch the core of organic beauty. Design issues, the best materials to use, print settings, troubleshooting advice, and FAQs all are covered in this post on 3D printing a curving tree. This guide will help you get the finest results whether you want to design a striking curving tree sculpture or lamp.
Why Would One 3D Print a Curved Tree?
1. Beautiful Attractiveness
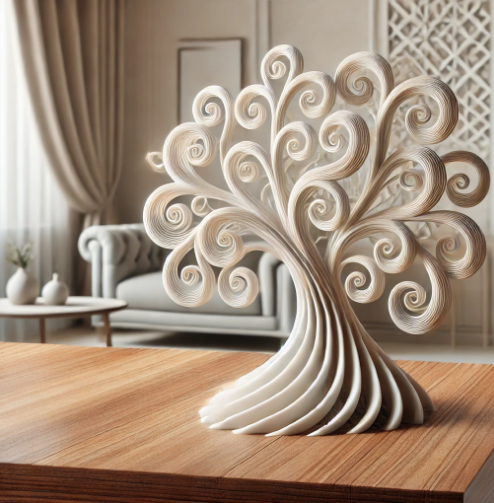
A curving tree design’s flowing, natural bends make it a unique decorative item for galleries, residences, or businesses. These artistic creations have uses as:
- Sculptural artwork
- Lamp bases printed in three dimensions
- Tabletop displays’ decorative tree models
2. Customization and Originality
Customizing the form, height, and branch constructions of your curving tree model is made possible by 3D printing. Using 3D modeling tools, you can alter STL files or design your own whether your preferred style is elegant, modern or twisted, bonsai-like tree.
3. An Excellent 3D Printing Project
For intermediate to experienced 3D printers, curly tree models are a great challenge because of their typically complex branches and overhangs. Perfect settings and supports will help you build amazing almost lifelike tree constructions.
4. Special Presentations & Interior Design
Unique and personal, a 3D-printed curving tree light, LED-lit sculpture, or seasonal ornament is a meaningful and artistic gift.
Locating or Designing a 3D Curved Tree Model
1. Downloading Free STL Documents
For individuals who like ready-made designs, various websites provide either free or paid STL files:
- Thingiverse
- My Mini Factory
- Cults3D
- Prusa Printers
- CGTrader (for premium, high-detail models)
2. Building a Custom Curvy Tree in Three-D Computer Graphics
If you wish to create your own curving tree, take some thought on using:
- Blender (Perfect for artistic and natural modeling)
- Fusion 360 (Best for exact, ordered trees with geometric curvature)
- Tinkercad (A beginner-friendly abstract, basic, tree model tool)
3. Aligning and Scaling the Model
- Change the tree height according to the print scale.
- Make sure the branches are thick enough not to break.
- Build stability by adding a strong base.
- If you wish to create a lamp effect or use LEDs, use hollow patterns.
The Ideal Filaments for 3D Printing a Curved Tree
1. PLA (Polylactic Acid)
✔ Perfect for novices
✔ Easy to print with minimum warping
✔ Available in wood-like filament for a genuine tree appearance
Best for: Non-functional art and decorative sculptures
2. PETG (Polyethylene Terephthalate Glycol)
✔ Stronger and more flexible than PLA
✔ Slightly glossy appearance for modern artwork
✔ Heat and moisture-resistant
Best for: Outdoor décor or LED-lit curving trees
3. Wood-Filled Filament
✔ Creates an organic, tree-like feel
✔ Can be dyed and mimics actual wood grain
✔ Moderately difficult to print
Best for: Artistic tree sculptures and lamp designs
4. Transparent or Glow-in-the-Dark Filament
✔ Ideal for 3D-printed curvy tree lamps
✔ Works great with LED lighting for a magical effect
✔ Requires higher print temps for best results
Best for: LED lamps, night lights, or futuristic concepts
Perfect 3D Print Configures for Curvy Tree Models
1. Layer Heights and Print Resolution
- 0.1mm to 0.2mm for detailed designs
- Higher resolution (0.1mm) recommended for intricate branching
2. Infill Proportional
- 10–20% infill for lightweight decorative models
- 40–50% infill for durability (e.g., a lamp stand or functional decor)
3. Print Coolability and Speed
- Print slowly (30–50mm/s) for smoother curves
- Enable cooling fans for PLA but reduce for ABS or PETG
4. Print Orientation and Supportive Tools
- Orient base flat on the print bed
- Enable tree supports to retain fragile limbs
- Use a brim to prevent warping
5. Post-Processing for a Superior Finish
- Sanding for better surfaces
- Wood staining or painting for a natural look
- Including LED lights inside would create a brilliant effect
Typical Issues and Solving Strategie
1. Thin Branches Breaking
✅ Solution: Increase wall thickness and infill. Stay flexible with PETG.
2. Poor Overhangs and Stringing
✅ Solution: Slow down print speed and enable supports.
3. Warping at the Base
✅ Solution: Use a brim or raft to secure the print.
4. Rough Surface Finish
✅ Solution: Lower layer height and sand post-print.
5. Filament Clogging in Wood-Filled Prints
✅ Solution: Lower print speed and increase nozzle size to 0.6mm or more.
READ MORE – 3D Printing a French-Style Cello Bridge: Plans, Materials & Tips
FAQs:
1. Could I Print a Curving Tree Without Any Support?
It depends on the design. While some smaller models with thick branches may print without supports, complex trees require tree-style supports.
2. How Long Does 3D Printing a Curving Tree Take?
Size and complexity will determine the duration—typically between three and twenty hours.
3. For a Brilliant Curving Tree Lamp, What Filament Would Be Ideal?
For maximum impact, use translucent PLA or glow-in-the-dark filament.
4. How Might I Replicate Actual Wood in My 3D-Printed Tree?
Print with wood-filled PLA, then sand, stain, or paint it for a natural look.
5. Is It Possible to Enlarge an STL Curvy Tree File?
Yes. Before printing, scale the model using Tinkercad or Cura either upward or downward.
Conclusion:
For every 3D printing fan, a curving tree 3D print is a lovely, artistic, and fulfilling activity. 3D printing provides countless opportunities for personalization whether your project is an artistic centerpiece, functional lamp, or ornamental sculpture.
Perfect curving tree designs that stand out as modern art or exquisite home décor may be produced with the correct materials, print settings, and finishing procedures.


